

Starter
Small Project
Good for demos, early launch, or stores with light traffic and limited products.
- CPU
- 1-2 vCPU
- RAM
- 2 GB
- Storage
- 40 GB SSD
- Bandwidth
- 1-2 TB
Best forTesting, small catalog, low daily orders
Ready eCommerce Bundle is a Laravel + Flutter multi-store grocery marketplace solution. This upgraded documentation is designed to help buyers install, configure, run, update, and maintain the complete product with confidence.
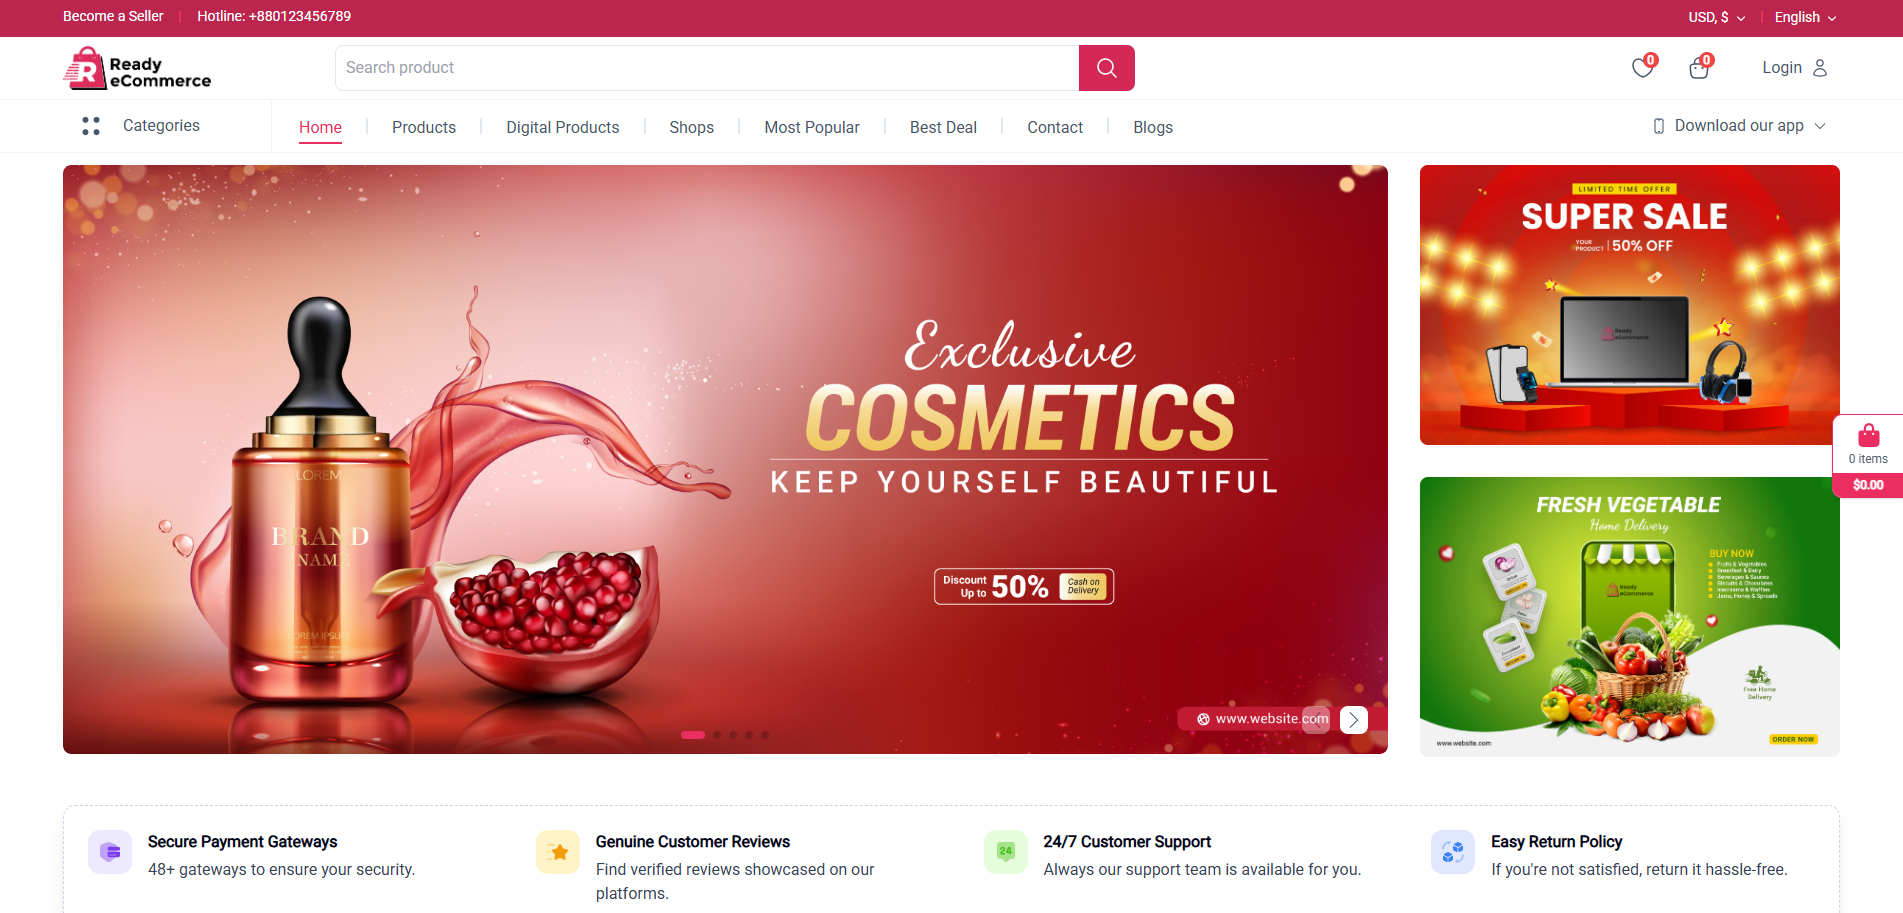
Website and Admin Panel install together, with a companion mobile app.
From server requirements and `.env` setup to updates and troubleshooting.
Structured headings, cleaner UX, and clearer technical guidance.
Reorganized for clarity, consistency, and a more professional presentation.
This guide consolidates the original documentation into a single professional reference so customers can install the product faster, configure it correctly, and understand how the web app, admin panel, and Flutter app fit together.
Ready eCommerce Bundle is positioned as a complete grocery marketplace solution rather than a single storefront. The following feature areas are the ones buyers typically expect to understand before deployment.
Supports grocery, multi-store, and eCommerce workflows through a central web admin and a customer-facing storefront.
Use the Laravel admin panel to control catalog data, business settings, orders, promotions, users, and operational configuration.
The companion mobile app lets you deliver a native Android and iOS experience with Firebase notification support.
Configuration support for payment gateways and purchase flows is included in the backend and mobile setup process.
Firebase and SMS-related settings can be configured to support customer communication and order-related notifications.
The product includes an update path through the browser and server-side composer workflow for future releases.
Use the following baseline requirements before installation. Matching these versions or their compatible equivalents will reduce avoidable setup issues.
| Component | Recommended | Notes |
|---|---|---|
| PHP | 8.2.x | Enable common Laravel extensions before installer launch. |
| Laravel | 10.x | Core backend framework used by the product. |
| MySQL | 8.x | Create a dedicated database and user for production. |
| Composer | 2.7.x+ | Required for dependency install and updates. |
| Node.js / npm | Latest LTS | Recommended if frontend assets need rebuilding. |
| Web Server | Apache / Nginx | Point document root to Laravel `public/`. |
| Component | Recommended | Notes |
|---|---|---|
| Flutter SDK | 3.35.3 | Install from the official Flutter channel. |
| Dart | 3.5.0+ | Comes with Flutter SDK. |
| JDK | 21 | Set `JAVA_HOME` correctly for Android builds. |
| Android SDK | 35.0.0 | Install through Android Studio SDK Manager. |
| Android Studio | 2022.3+ | Install Flutter, Dart, and Gradle plugins. |
| Xcode | Latest stable | Required only for iOS builds on macOS. |
Before starting the installer, make sure your server has the common Laravel requirements enabled, including `openssl`, `pdo`, `mbstring`, `tokenizer`, `json`, `xml`, `ctype`, `fileinfo`, `curl`, and `bcmath`.
Shared hosting can work, but a VPS or managed cloud server generally gives better performance, control, and fewer extension-related issues.
Choose your production server based on expected traffic, order volume, and operational needs. A VPS or managed cloud server is strongly recommended over low-resource shared hosting for a Laravel marketplace with Website, Admin Panel, APIs, cron jobs, queues, and media uploads.
For most stores, the Standard / Medium Project plan is the best starting point. Upgrade when traffic, product count, image uploads, or concurrent orders increase.
Good for demos, early launch, or stores with light traffic and limited products.
Best default choice for a real production launch with stable storefront and admin usage.
Recommended when catalog size, customer activity, API usage, or order volume grows.
Use managed cloud infrastructure when uptime, scaling, and monitoring are critical.
 DigitalOceanBest overall VPS
 Hostinger VPSBudget friendly
 Namecheap VPSCost effective
 AWSEnterprise scale
Use Ubuntu LTS, Nginx, PHP-FPM, MySQL, Redis if queue/cache is needed, Certbot SSL, daily backups, and a properly configured cron job for Laravel scheduler.
After downloading the product from CodeCanyon, locate the web installer and mobile application source. The Website and Admin Panel are not separate web installations: both are deployed together from the same install.zip package.
install.zipThe complete Laravel web system containing both the Website and Admin Panel.
The companion Android and iOS source package, configured after the web system is online.
Updated setup, publishing, and maintenance instructions.
Ready eCommerce Bundle uses one guided web installation. Upload install.zip to your server and complete the installer once; the process installs and configures both the public Website and the Admin Panel automatically.
The Website and Admin Panel share the same Laravel application, database, and configuration. Do not upload or install them separately.
Connect the domain or subdomain to the target server directory, confirm the required PHP extensions are enabled, and keep your database details and CodeCanyon purchase code ready.
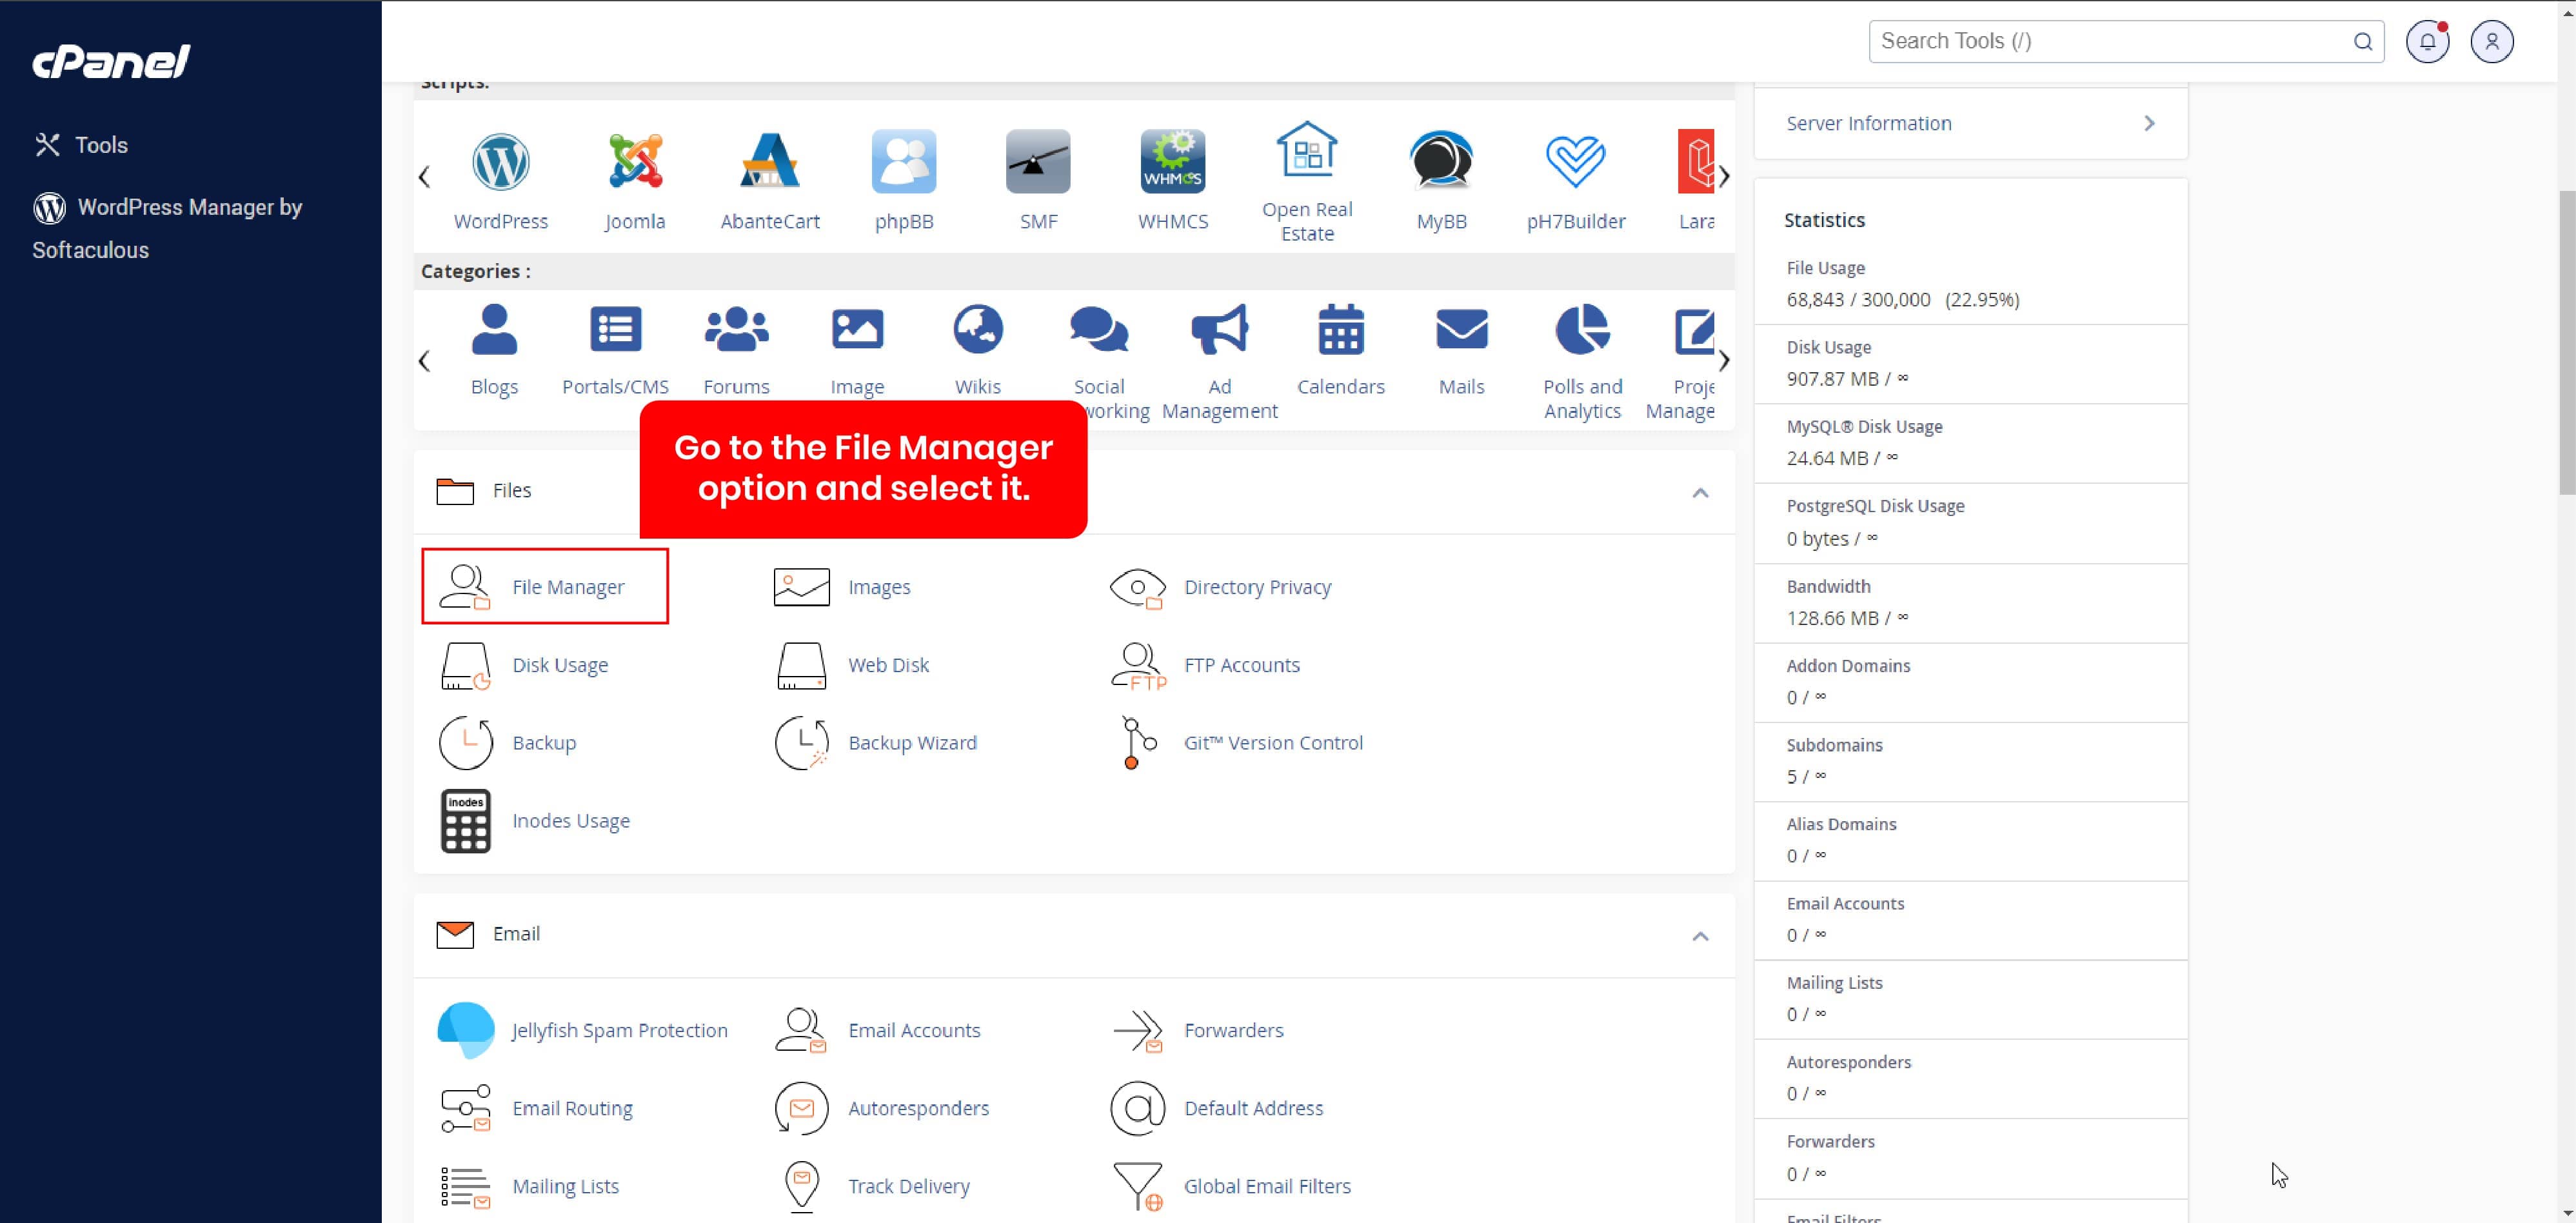
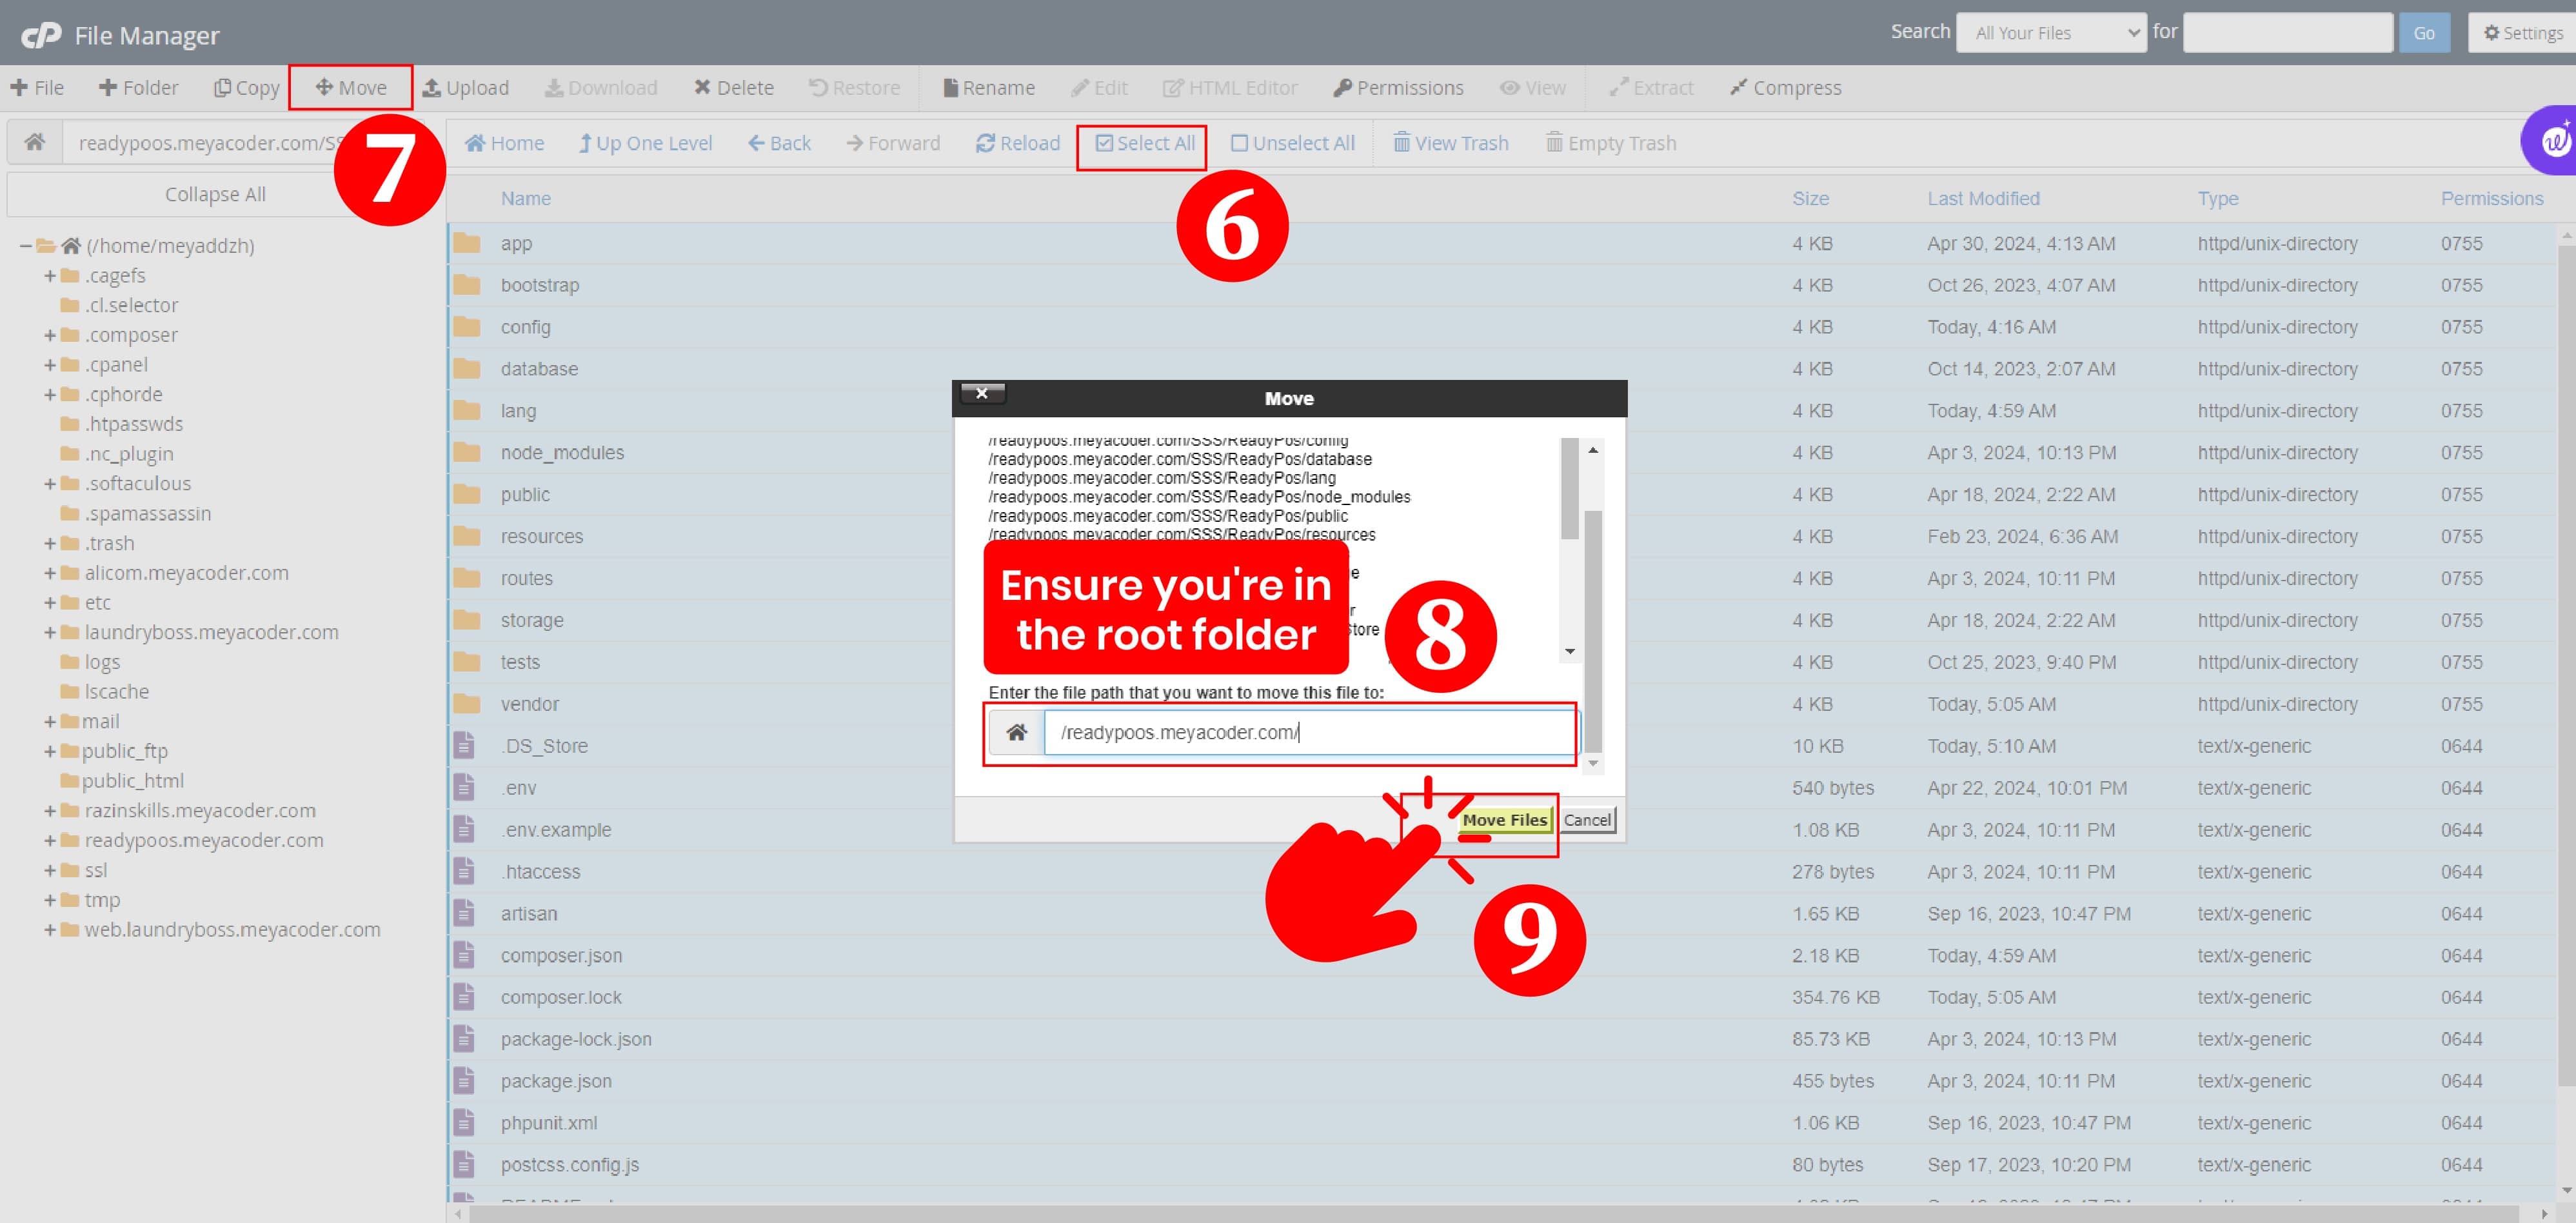
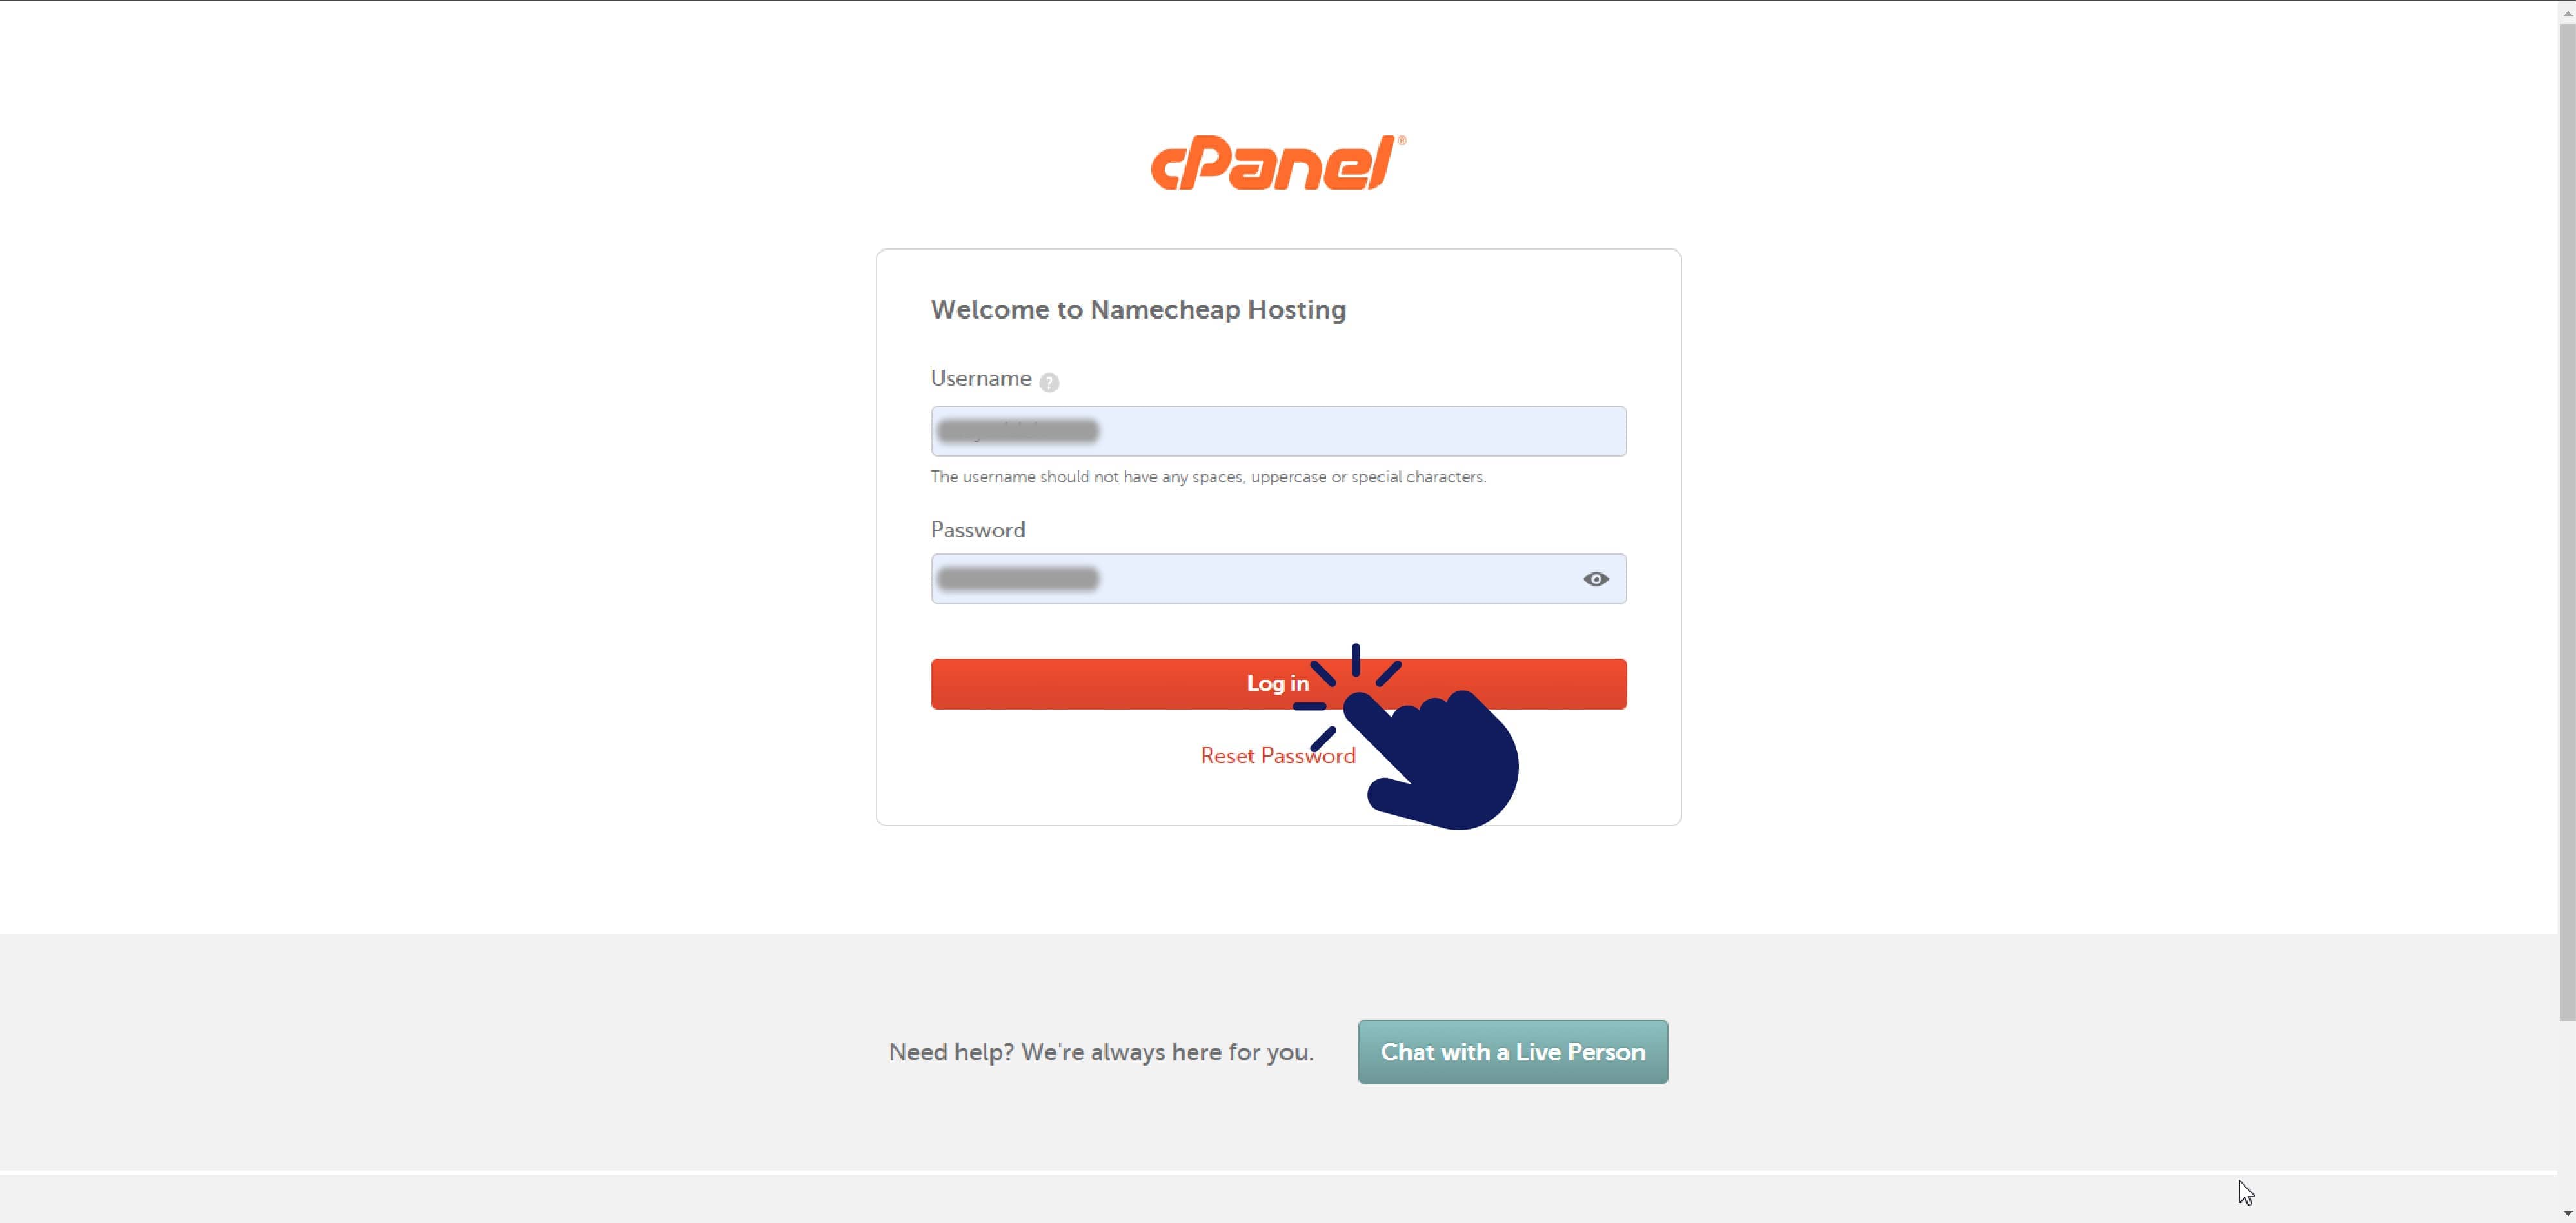
install.zipSign in to your hosting control panel, open File Manager, and navigate to the document root connected to your domain. Upload the provided install.zip file to this directory.
.jpg)
install.zip.Upload install.zip directly. You do not need separate Website and Admin Panel archives.
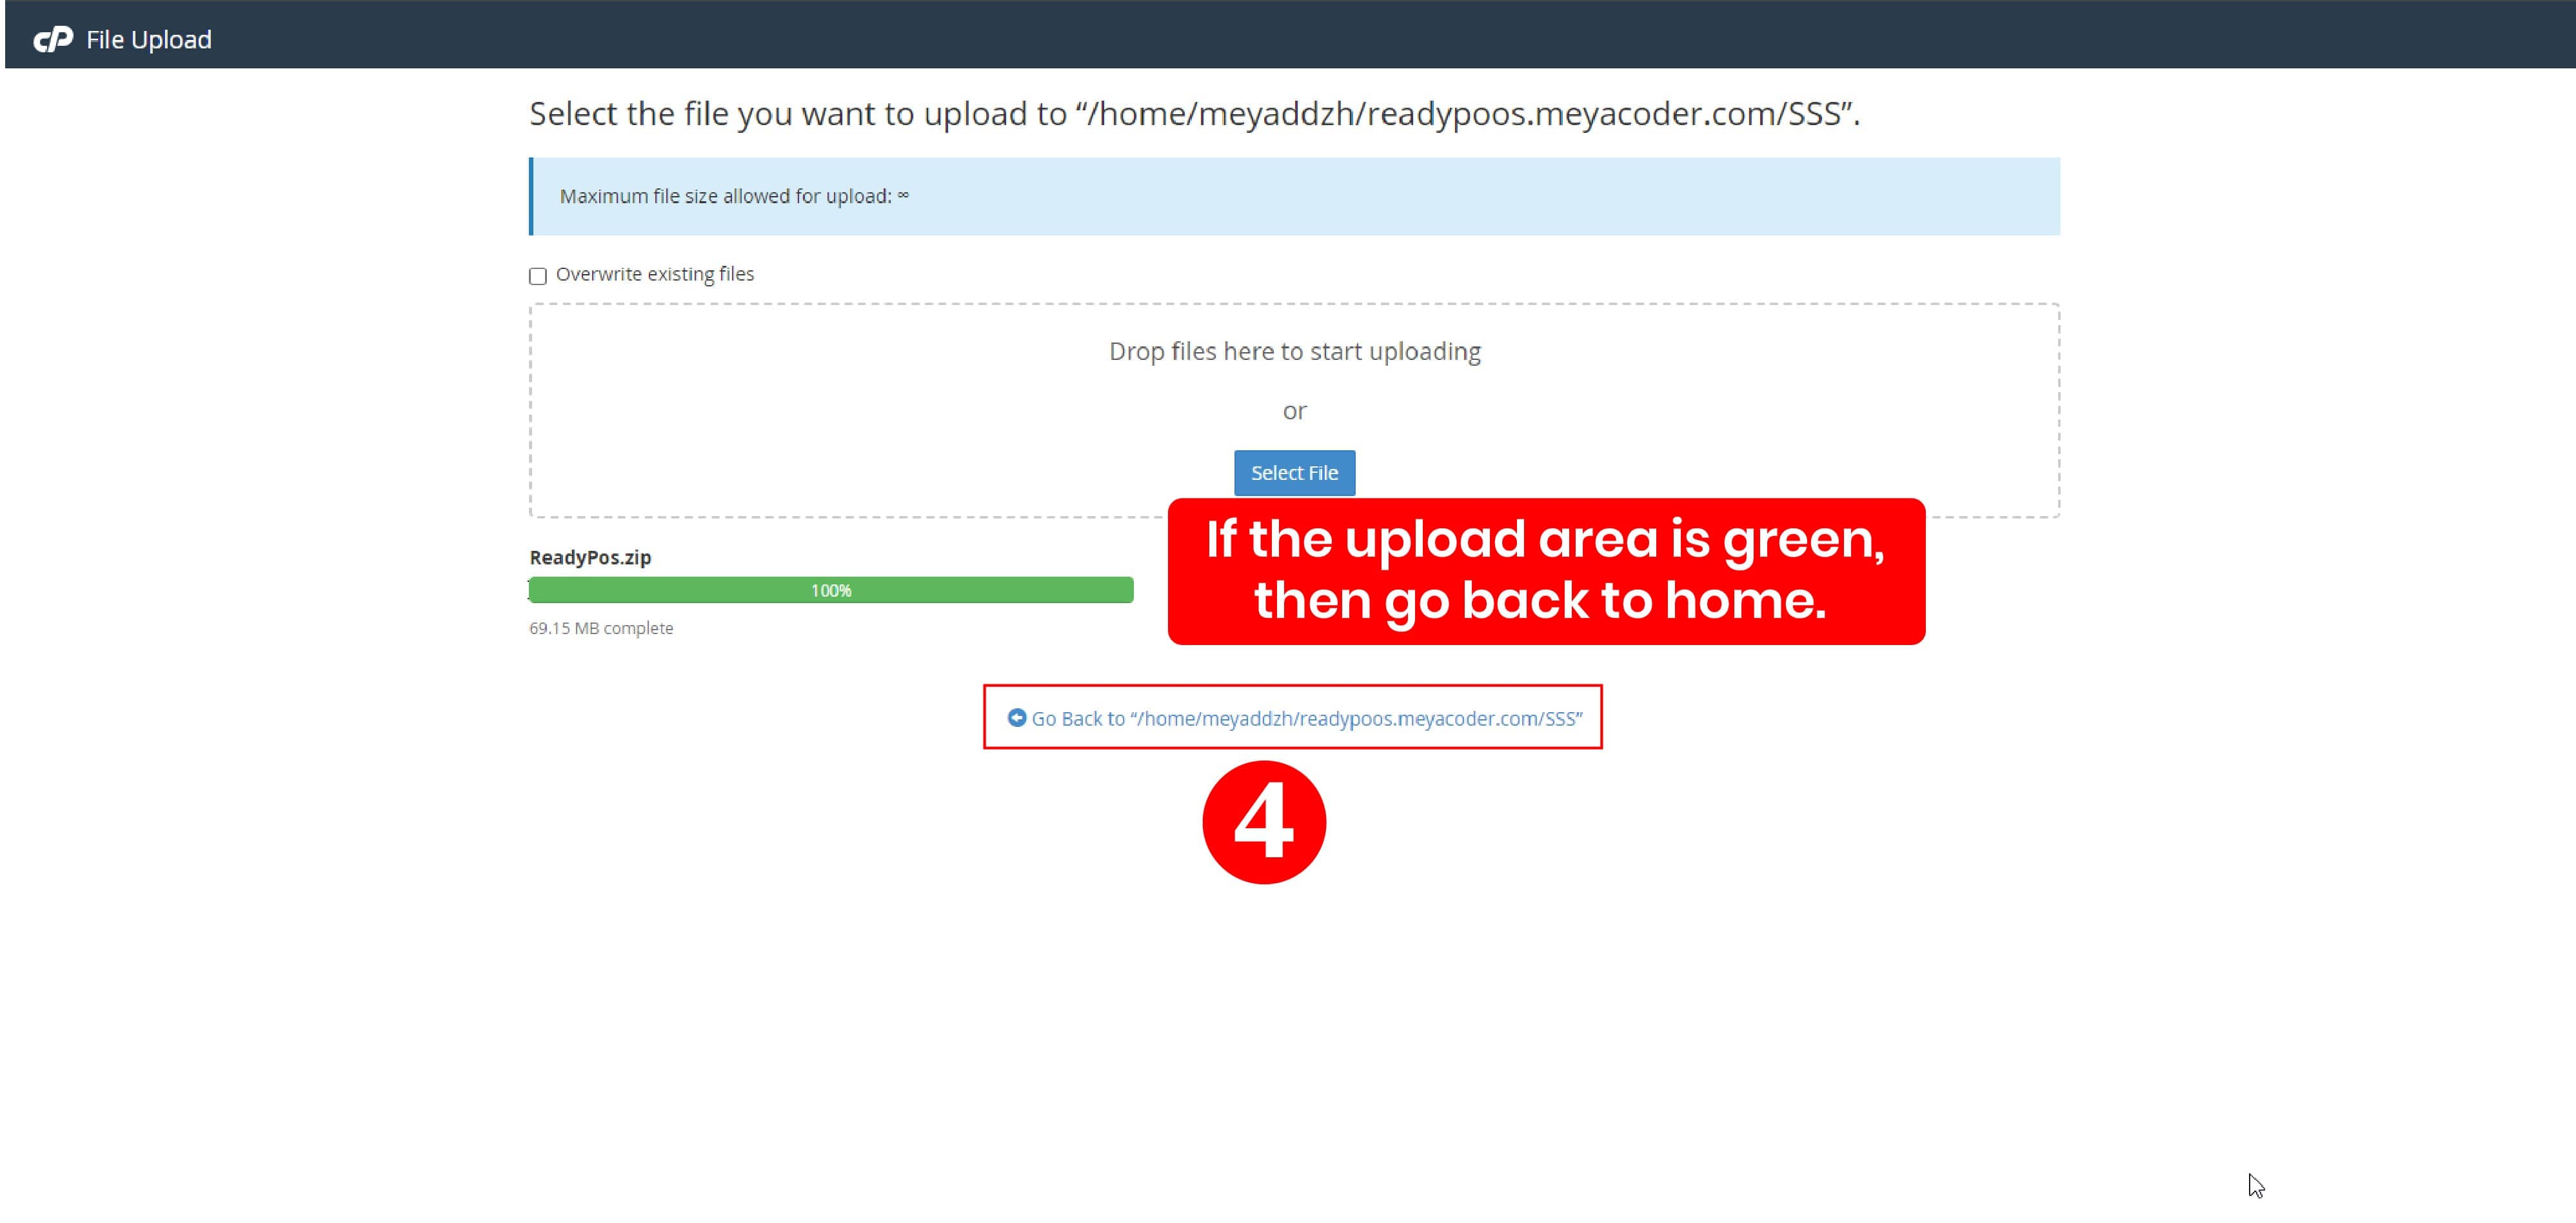
After the upload reaches 100%, return to File Manager, select install.zip, and choose Extract. If the files are extracted inside a nested folder, move all extracted contents into the domain root.
.jpg)
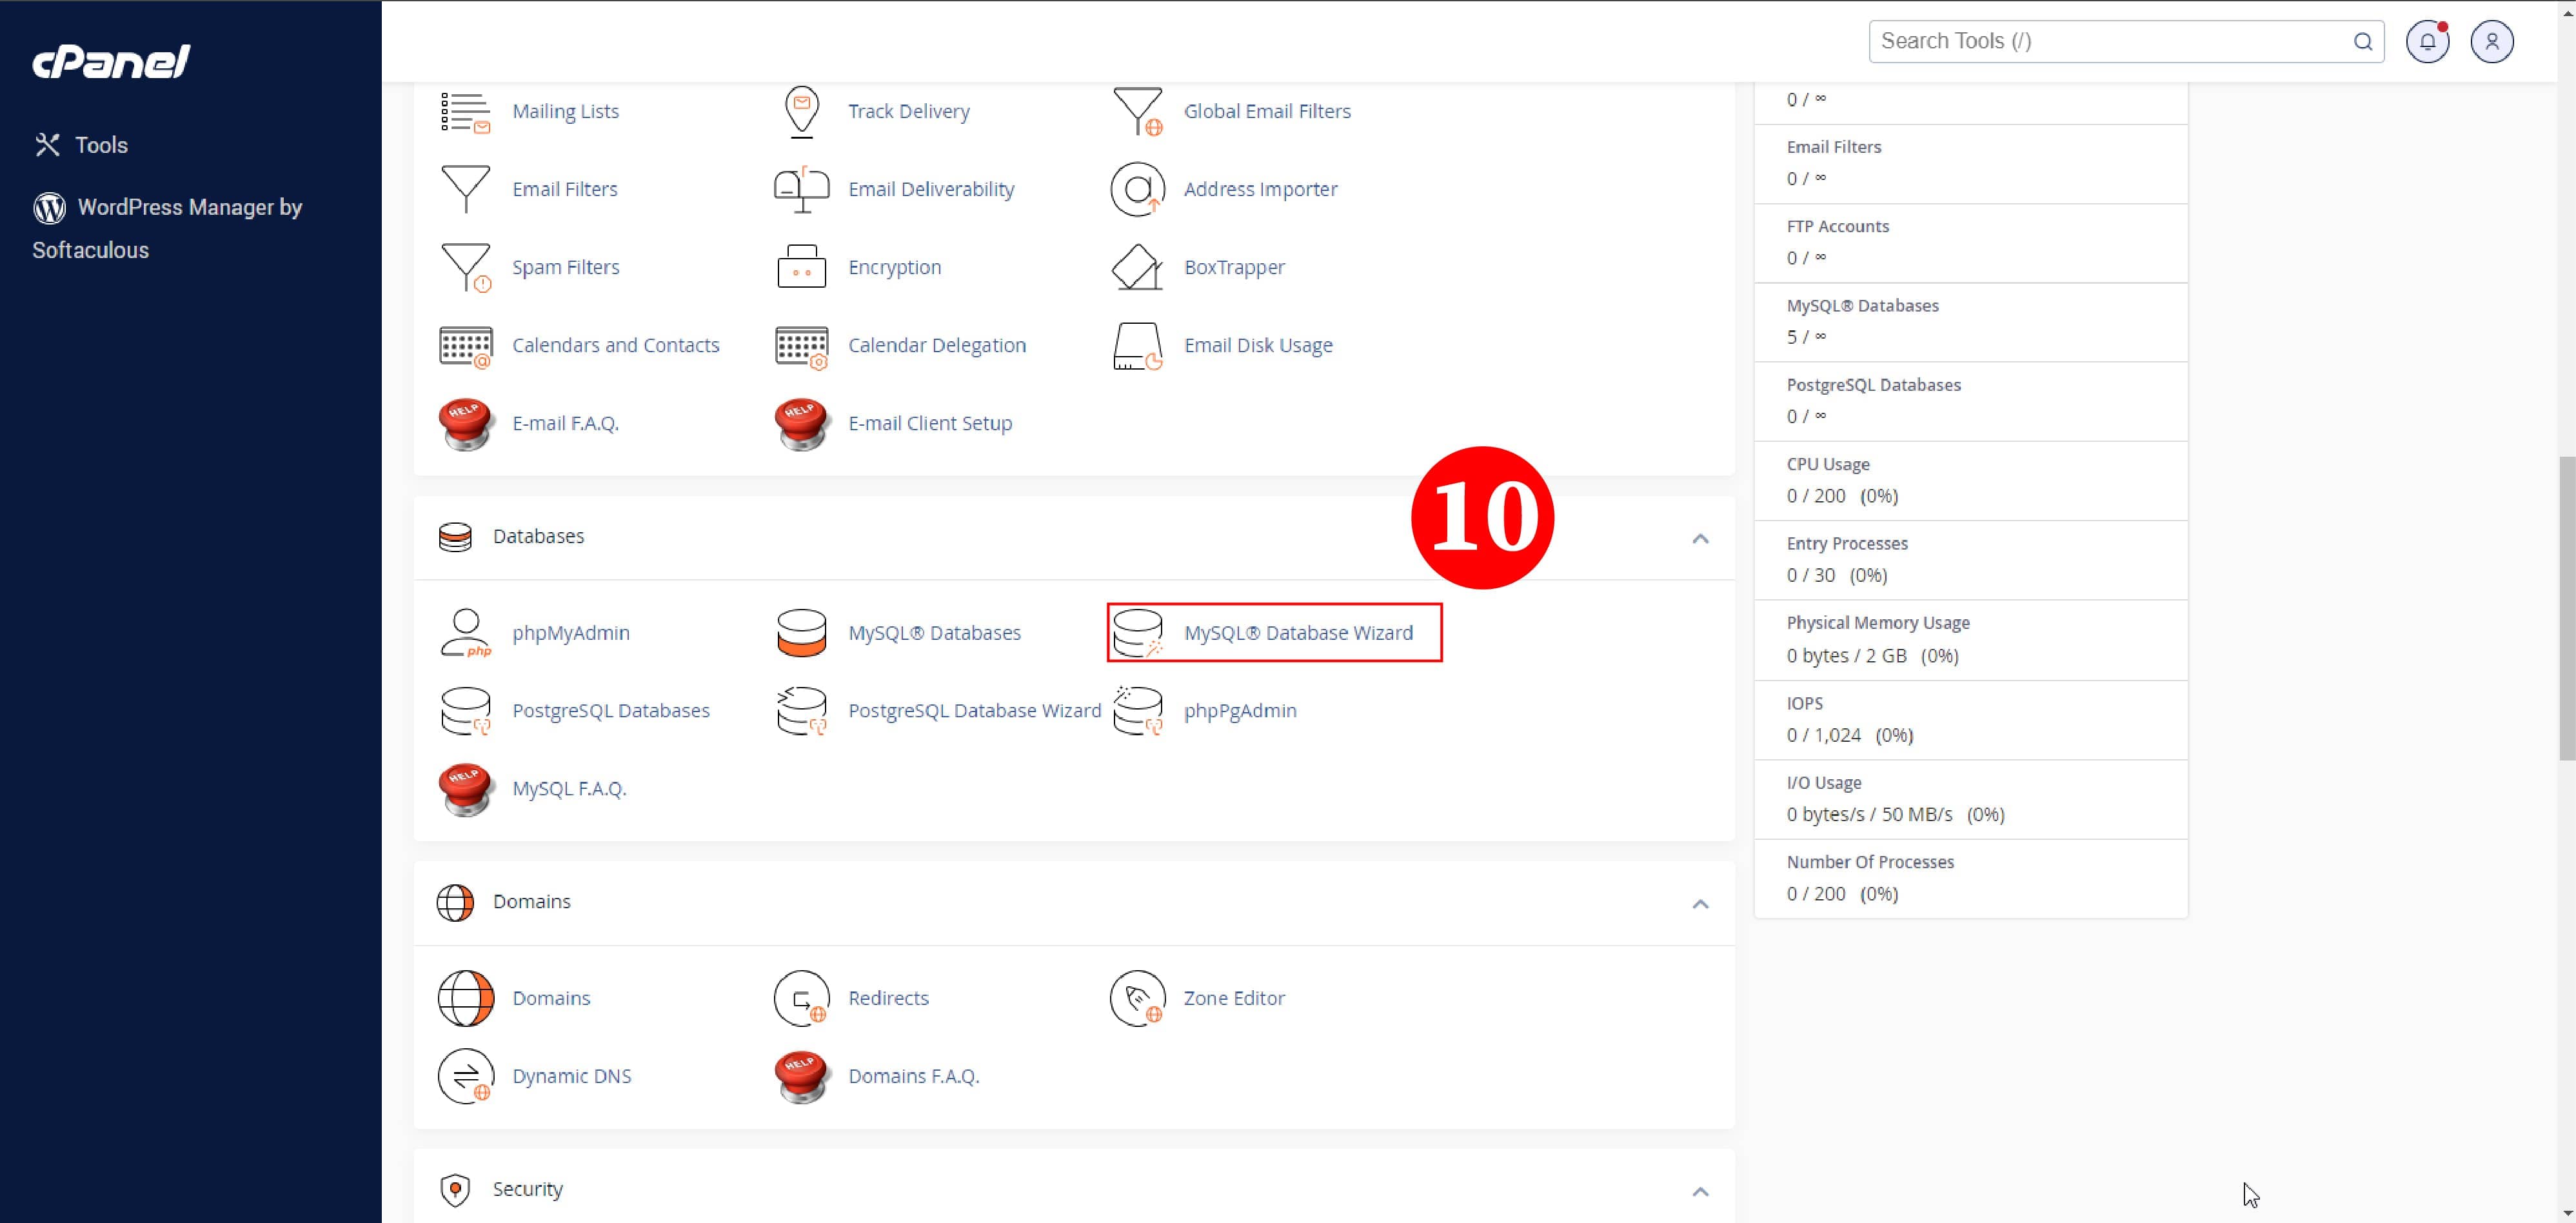
From cPanel, open MySQL Database Wizard. Create a new database, create or select a database user, assign the user to the database, and grant all required privileges. Keep these credentials available for the installer.
Open the domain connected to the extracted files, for example https://your-domain.com. Select Start Installation Process, review the directory permission check, and confirm every required PHP extension is enabled before continuing.
If a required extension or folder permission is marked as unavailable, correct it in your hosting panel and refresh the installer before proceeding.
Enter the application name and base URL, select production as the environment, use public as the filesystem, and keep debug mode disabled for a live server. These settings apply to both interfaces.
.jpg)
Select MySQL and enter the host, port, database name, username, and password created in Step 3. The default MySQL port is usually 3306; the database host depends on your hosting provider.
.jpg)
Enter your email address, domain, CodeCanyon username, and valid Ready eCommerce Bundle purchase code. Submit the verification form to continue to final installation.
.jpg)
Review the final confirmation and select Final Submission. The installer creates the database structure and completes the shared Laravel setup. After the success screen appears, use the links below to access the Website and Admin Panel.
https://your-domain.comhttps://your-domain.com/adminYour Website and Admin Panel are now installed together and connected to the same database. Sign in to the Admin Panel to complete business settings before launch.
Complete these checks before allowing customers to use the Website.
The web installer creates the core environment configuration for both the Website and Admin Panel. The `.env` file shown below is an advanced reference for administrators who need to review or update server-level settings after installation.
APP_NAME="Ready eCommerce Bundle"
APP_ENV=production
APP_URL=https://your-domain.com

DB_DATABASE=your_database_name
DB_USERNAME=your_database_user
DB_PASSWORD=your_database_password

MAIL_MAILER=smtp
MAIL_HOST=smtp.gmail.com
MAIL_PORT=587
MAIL_USERNAME=your_email@example.com
MAIL_PASSWORD=your_mail_password
MAIL_ENCRYPTION=tls
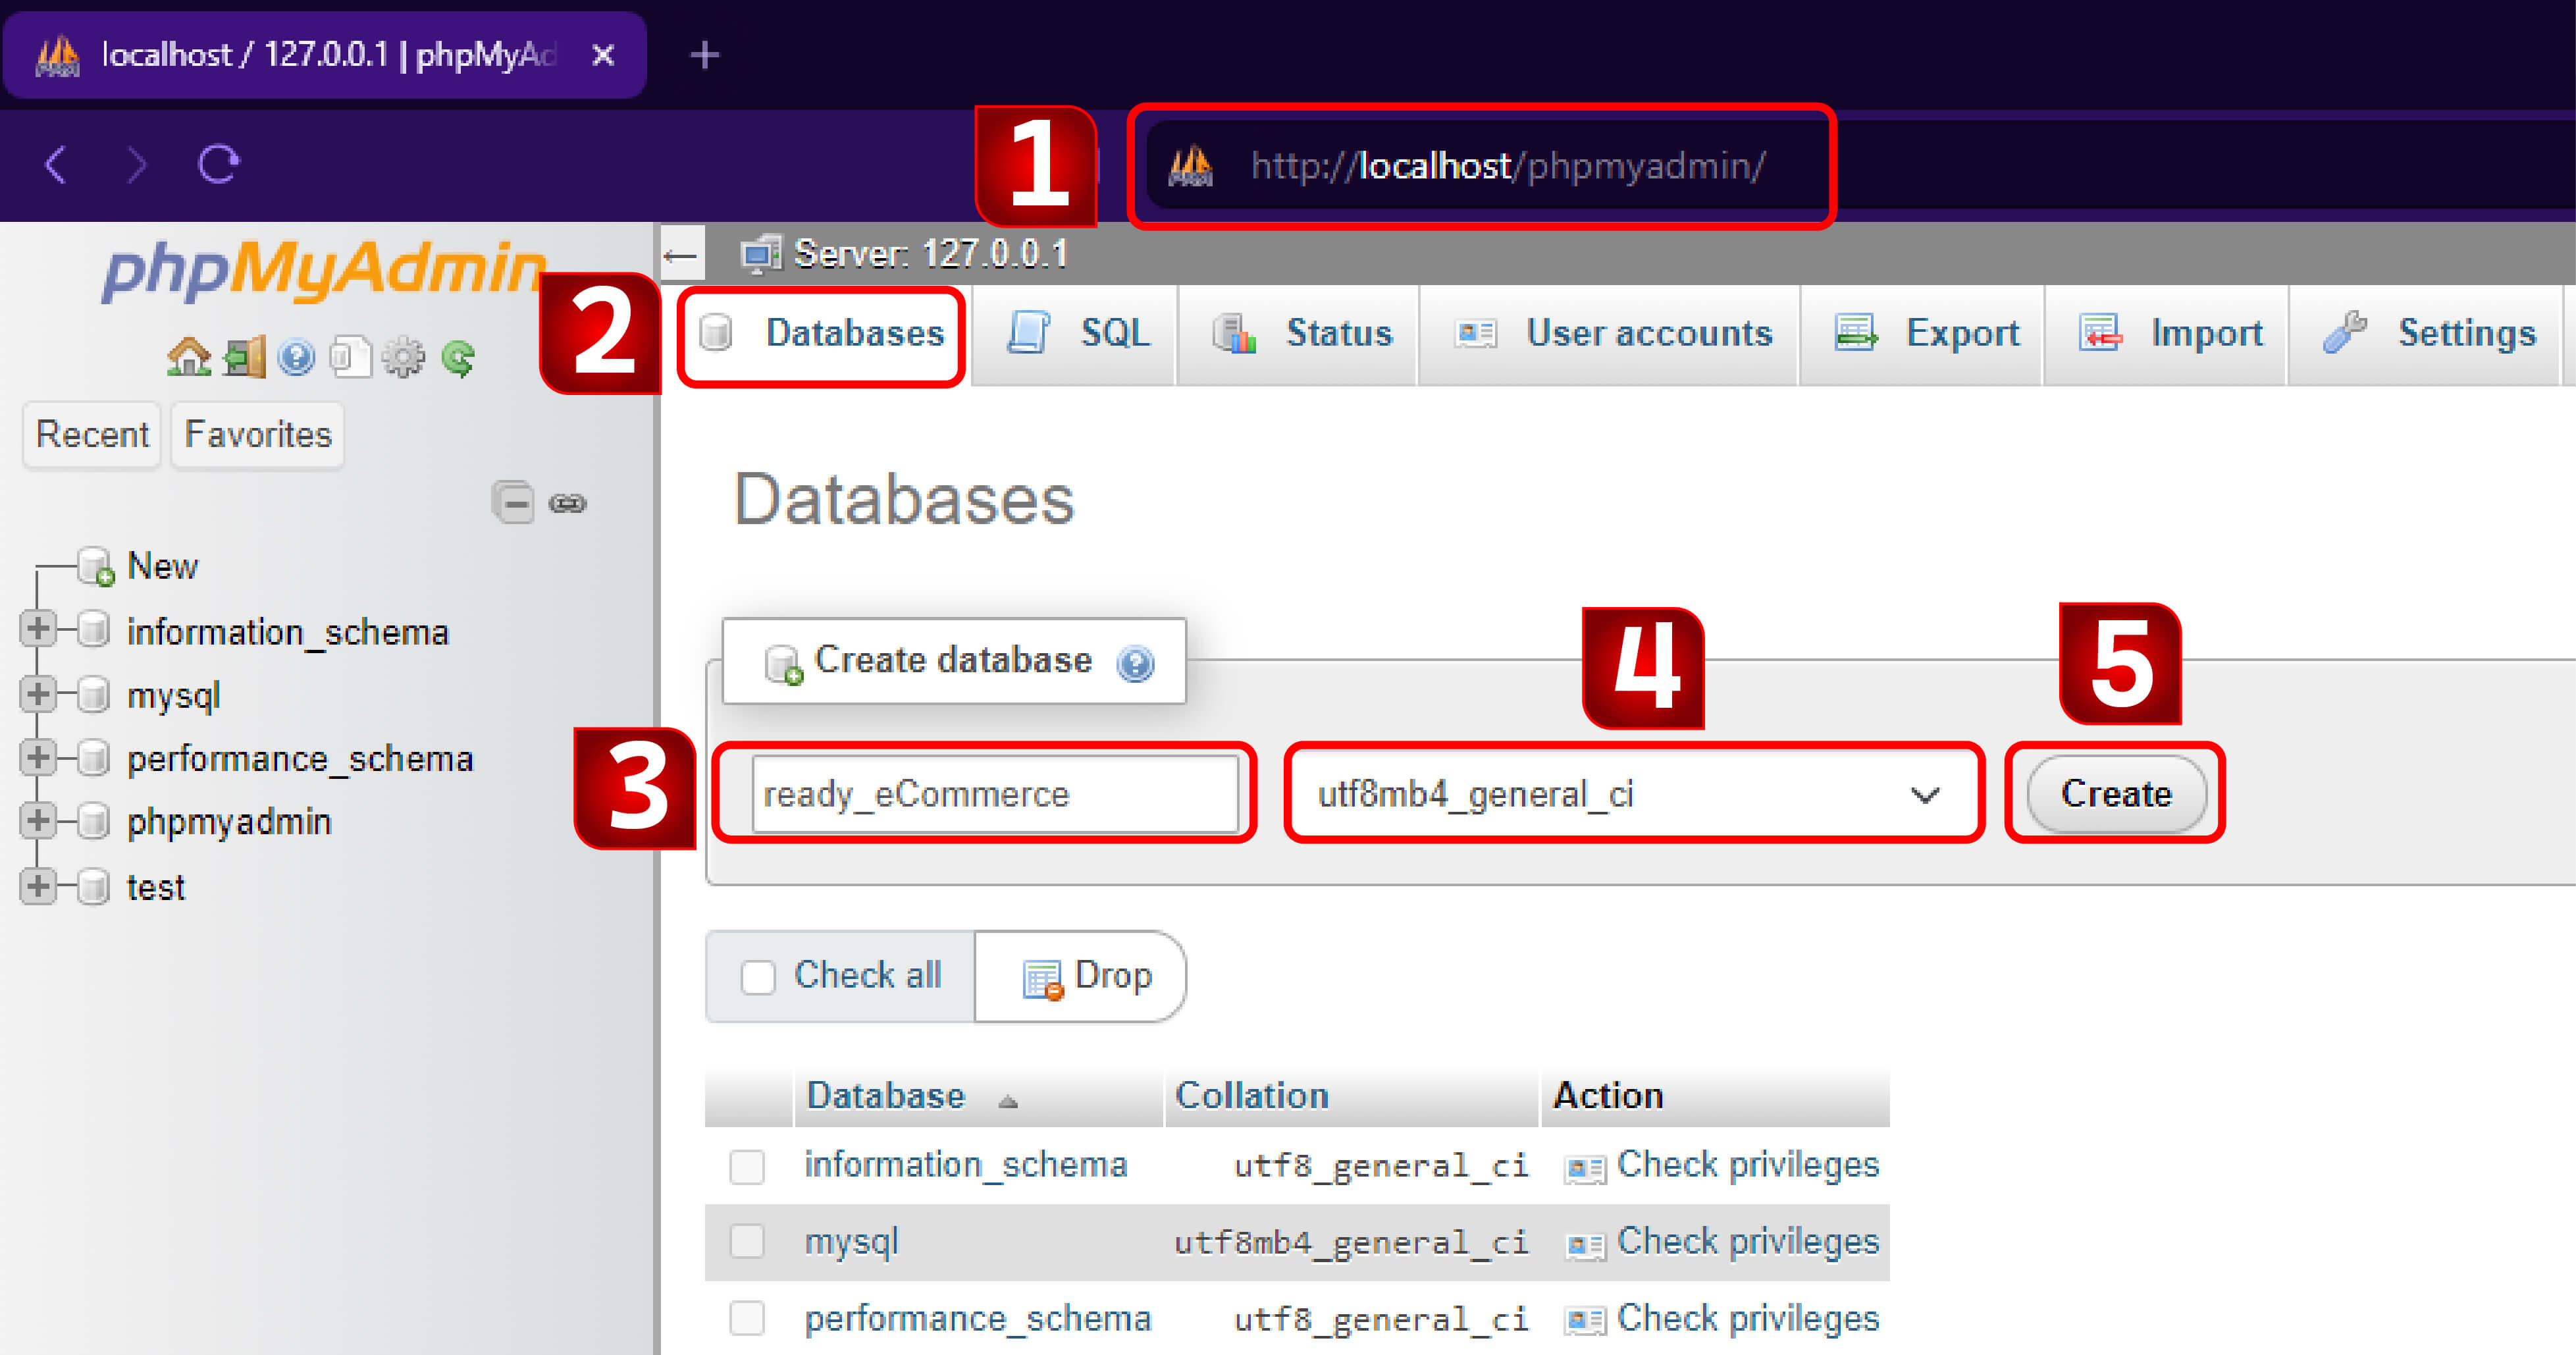
MAIL_FROM_ADDRESS=no-reply@example.comCreate one empty MySQL database before opening the web installer. During installation, Ready eCommerce Bundle connects both the Website and Admin Panel to this same database and prepares the required tables automatically.
php artisan app:push-dataOnce the application is installed, complete the business and service-level settings from the admin panel so the product can operate correctly in production.
Application name, domain, branding, timezone, and localization preferences.
SMTP host, port, encryption type, and sender identity for transactional messages.
Configure gateway credentials and any supported SMS provider details carefully.
Set Firebase, FCM, and application package identifiers for Android and iOS.
The downloaded CodeCanyon package keeps the installable web system and Flutter source separate. Upload only install.zip for the Website and Admin Panel installation.
Ready eCommerce Bundle-Package/
|-- install.zip              # Website + Admin Panel web installer
|-- flutter-app/             # Mobile application source
|   |-- android/
|   |-- ios/
|   |-- lib/
|   |-- assets/
|   |-- pubspec.yaml
|-- documentation/
|   |-- index.html
| |-- assets/The admin panel is the operational center of Ready eCommerce Bundle. After installation, review every settings area before allowing real customer traffic.
Products, categories, brands, units, and inventory-related settings.
Order review, status management, fulfillment, and customer communication.
Customers, administrators, and role-based operational access.
Payments, mail, notifications, branding, taxes, and delivery-related configuration.
The customer-facing experience should be tested from end to end after installation. Use the following journey as a practical QA checklist before launch.
Confirm customers can view home content, categories, offers, and product listings.
Verify cart operations, quantity updates, shipping logic, and pricing calculations.
Test address selection, payment flows, and order placement success states.
Ensure order history, status updates, and customer notifications work as expected.
The original documentation already included a detailed Flutter setup path. The streamlined workflow below preserves those steps while making them easier to follow.
flutter --version
flutter doctor
flutter pub get
flutter run
flutter build apk --release
flutter build ios --release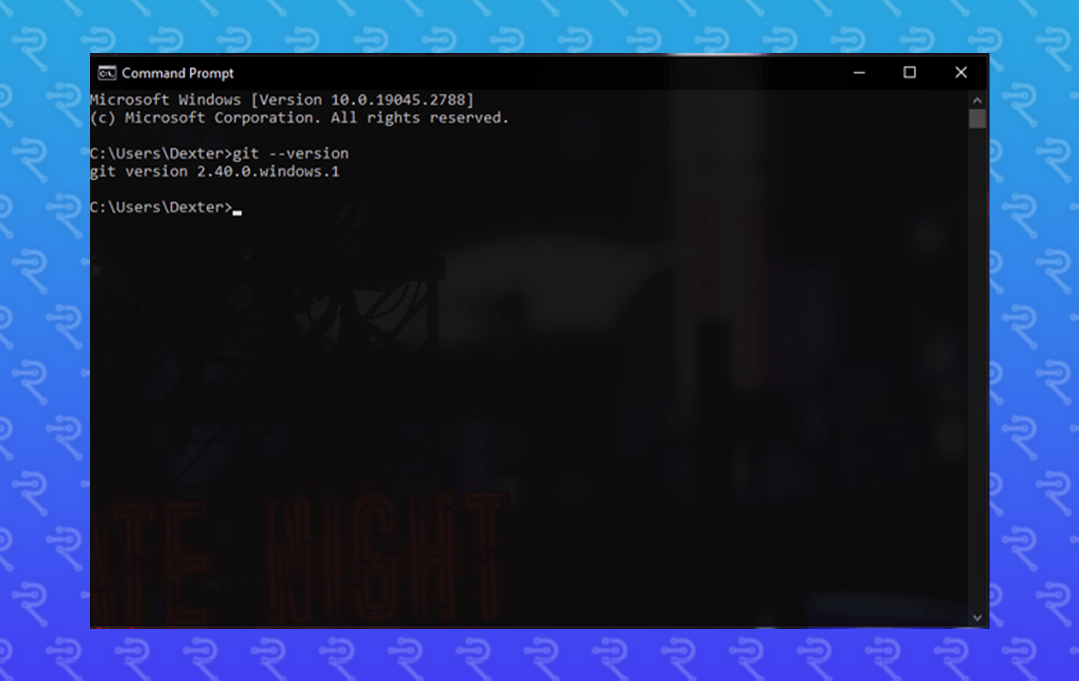
Push notifications require project-level Firebase configuration for both Android and iOS. Keep the Firebase project identifiers aligned with your application package names and bundle IDs.
firebase_core
firebase_messagingThe original documentation included detailed Google Play and Apple App Store walkthroughs. This section keeps the practical checkpoints while presenting them in a cleaner review-friendly format.
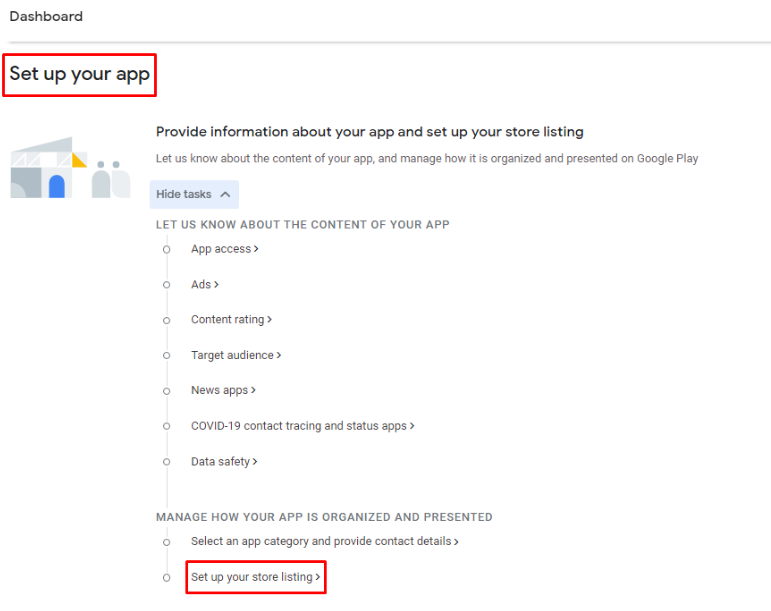
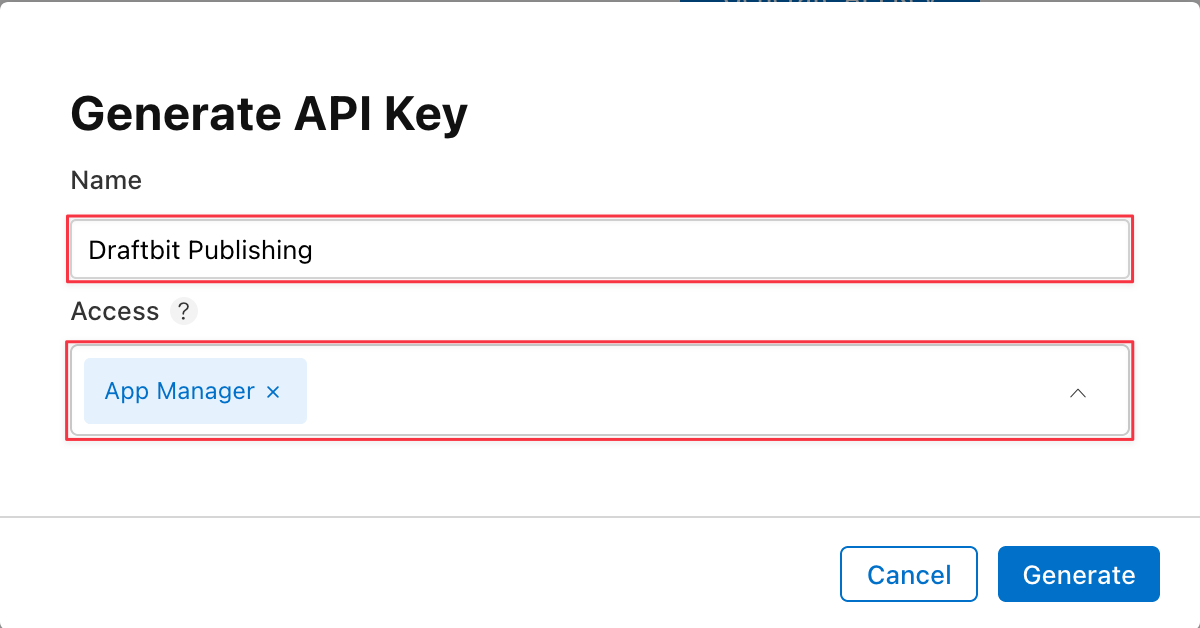
Before updating a live site, back up your project files and production database, and perform the update on a staging copy first whenever possible.
| Preserved (never touched) | Replaced (new release wins) |
|---|---|
.env (all your config & keys) | All application code (app/, routes/, resources/, …) |
storage/ (uploads, logs, backups) | vendor/ (shipped with each release) |
public/storage symlink & public/uploads | public/build compiled assets |
| Your database (migrations are additive) | composer.lock, VERSION |
/home/user/releases/readyecommerce-v1.1.0.storage/backups/, enters maintenance mode, rsyncs the new code over the install (preserving .env + storage/ + uploads), runs new migrations only, rebuilds caches, and brings the site back up../update.sh /home/user/releases/readyecommerce-v1.1.0.env.php artisan down..env, and do not delete storage/ or public/storage / public/uploads.php artisan migrate --force.php artisan optimize:clear, then php artisan config:cache, php artisan route:cache, and php artisan view:cache.php artisan queue:restart.php artisan up.php artisan down..env + storage/).storage/backups/pre-update-*.sql:
mysql -u USER -p DBNAME < storage/backups/pre-update-....sqlphp artisan optimize:clear then php artisan up.VERSION (build-release.sh persists the version you enter).Schema::hasTable() / Schema::hasColumn() so they are safe to run on populated production databases. Never rename or drop columns in a point release../build-release.sh <version> and verify the zip contains vendor/ and .env.example, and does not contain .env, storage/installed, or any credentials../update.sh from the previous release on a staging copy.If installation or runtime behavior is not working as expected, review these common problem areas first.
These are the most common questions customers tend to ask while setting up a marketplace product like Ready eCommerce Bundle.
Open each question below for concise setup guidance. The first item is expanded by default so new buyers immediately understand the installation flow.
install.zip web installer in a compatible local PHP/MySQL environment. It still installs both the Website and Admin Panel together.public/ directory for a standard production setup.install.zip once. The same installer deploys and configures both interfaces together in one installation process.php artisan app:push-data.Support works best when the request includes enough technical context. Before contacting support, collect the details below so the team can identify the issue faster.
For item support, license-related help, and product questions, use the official channels below.
Track Ready eCommerce Bundle improvements, bug fixes, and production-ready updates in a clean release timeline.
12 January 2026
What we updated
09 December 2025
What's new
19 November 2025
What's new
This documentation website uses the following third-party resources.
| Library / Asset | Usage | Website |
|---|---|---|
| Bootstrap 5 | Responsive layout and UI components | getbootstrap.com |
| Bootstrap Icons | Interface icons | icons.getbootstrap.com |
| Google Fonts | Typography: Outfit and JetBrains Mono | fonts.google.com |
| Original product screenshots | Documentation illustration assets | Included with the product package |
No matching sections found. Try a broader keyword like installation, firebase, or update.